OS Development
Create a custom distro with Cubic
ARTICLES
L0hKey
9/22/20246 min read
Over the years I have had some fascination with operating systems. Learning on how they work, the components of an operating system and other topics. Every operating system serves a purpose and for most of us we have a certain preference whether it be Windows, Mac or Linux for example. There is no right or wrong answer really. For the purpose of this post I will use the Linux operating system.
Linux has many varieties known as distros or distributions. Each distro serves a purpose from general use, security, to creating a complex server for a network. A popular distro which will be used in this example is Ubuntu which is derived from Debian Linux. Since Linux is open source the concept allows people to create or derive their own Linux versions if they wish. This can be useful for business settings where you want to have an operating system installed with the same image. A classroom setting might have each device come pre-installed with an operating system and the neccessary programs to come with it. This can save time from having to install each new program not included in the initial install.
Having diverse options of Linux distros is great but what if we wanted to create our own distro that is derived from Ubuntu for example. Ubuntu has a program that can be installed for this purpose such as Cubic. Cubic which is also known as Custom Ubuntu ISO Creator allows you to take a copy of a Ubuntu image, add programs of your own and repackage the image into a new image which can then be installed on other media or devices as the way you customized it. With some work we can also rename it to our own to in a sense create a distro of our own.
First we need to make sure we have it installed. Since this is likely not part of the standard Ubuntu software repository we will need to install it via github. The github link https://github.com/PJ-Singh-001/Cubic provides the instructions on how to install cubic. The steps are listed as follows:
sudo apt-add-repository universe
sudo apt-add-repository ppa:cubic-wizard/release
sudo apt update
sudo apt install --no-install-recommends cubic
For the last step be sure to use --no-install-recommends to save space and time. From here we can find Cubic installed and click on the icon which should pop up this window.
Write your text here...
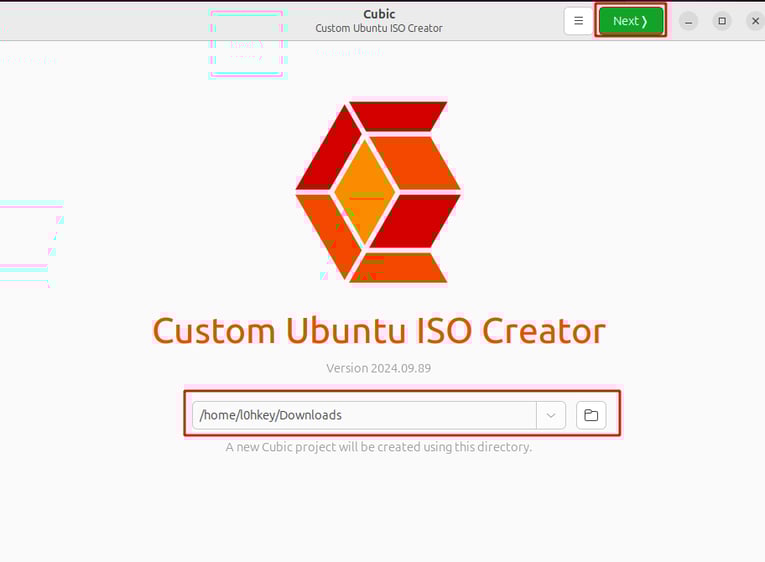
In order to proceed with the next step we need to have an .iso image for a baseline. We can download a Ubuntu image file from the Ubuntu website. Just store the file in a folder or use an image file of Ubuntu that is already saved in your hard drive. With an image file in the drive we can pick the location we want to work with. In this example we will just use the Downloads folder where the .iso file is already stored. After selecting the Downloads folder we click on “Next”

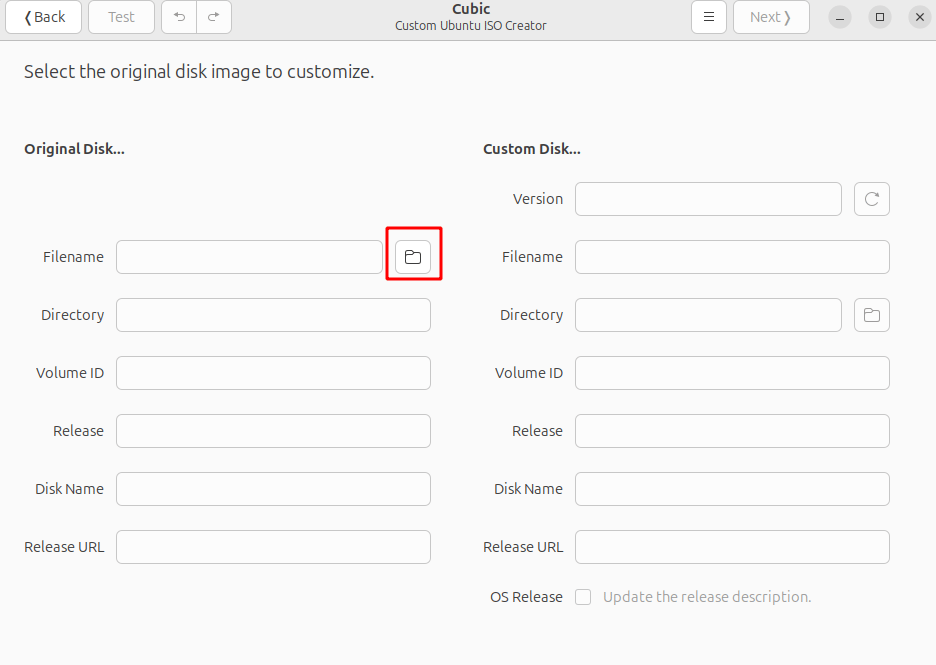
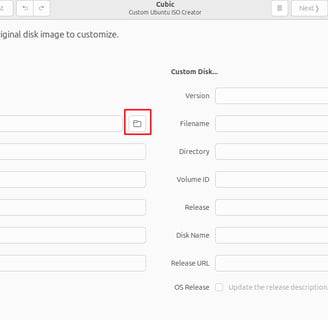
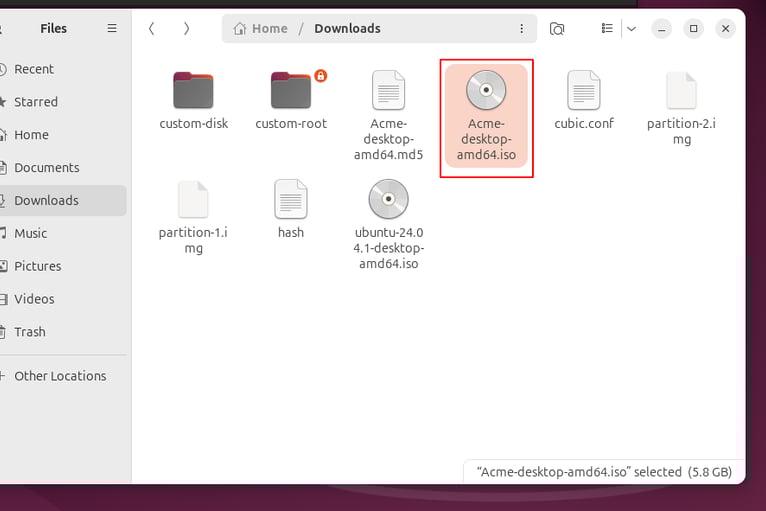
Next we will pick the actual .iso that has been saved into our hard drive to begin our custom distro. Everything in this window will appear blank at first. Just click on the folder icon to choose your file.
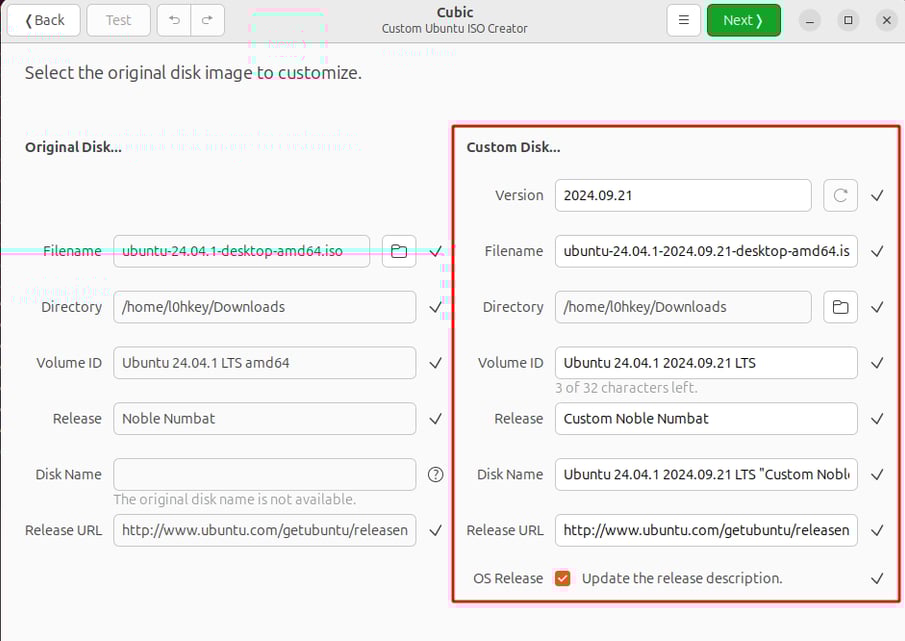
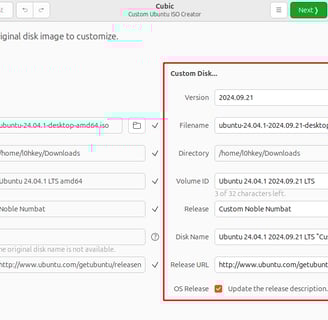
Once the file has been chosen all the other boxes should fill out automatically for you. Be sure to notice the boxes on the right hand side lists “Custom Disk” as those are the names you may want to change if you want to give your distro and files a unique name to your liking.
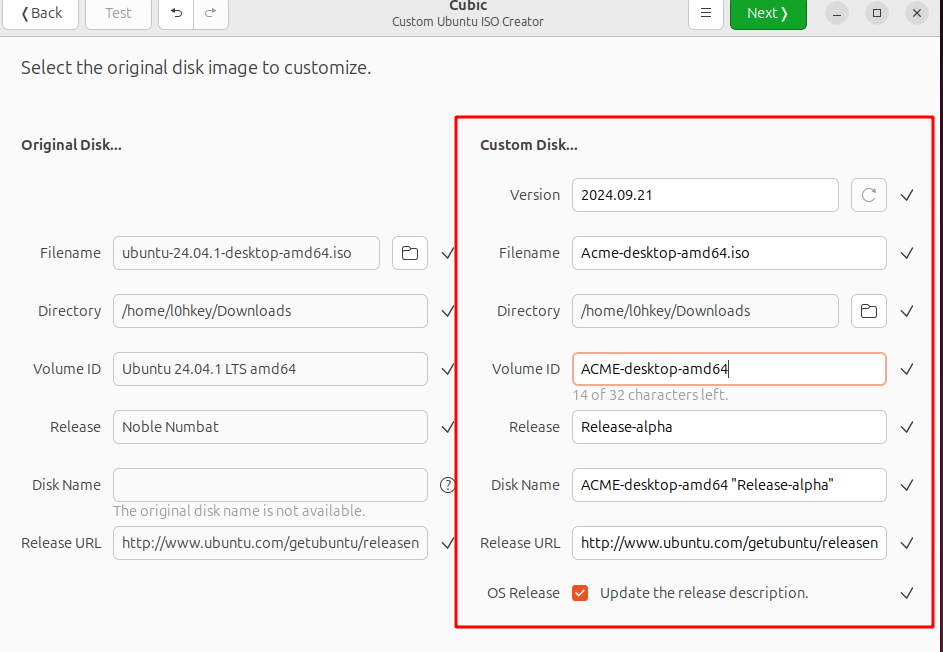
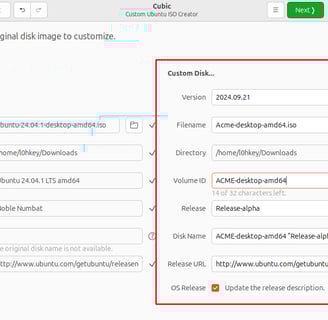
With this in mind we could change items such as Version, Filename, Volume ID and Release for example. This requires some experimentation so you may want to go through this process a few times.
Once you click on next it will begin to open the iso file so we can work on more customization which may take a couple minutes before it presents you with a terminal window.
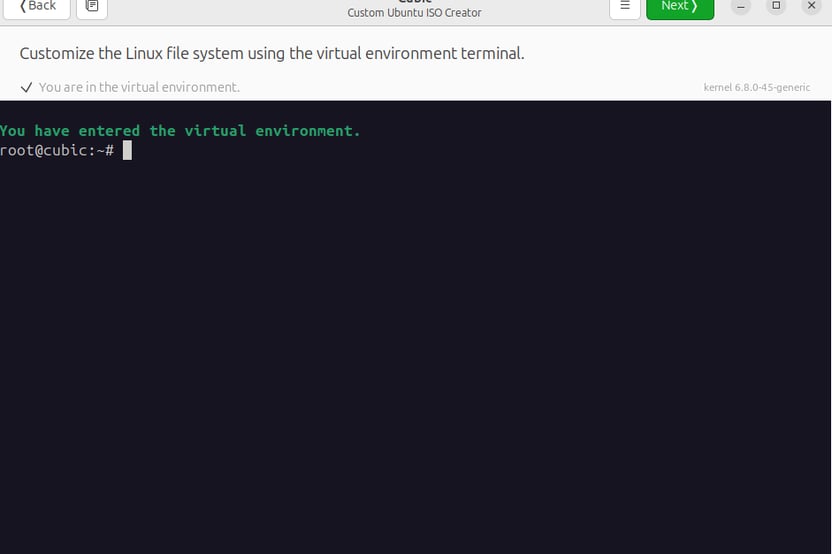
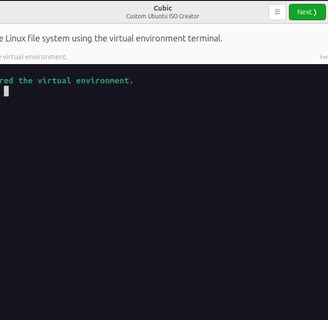
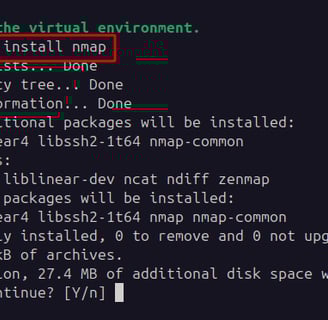
Take note that this is a virtual environment that has root running inside so we do not need to use sudo to install programs here. This is where most of the customization takes place. For example you might want to install some security focused programs such as nmap which is a network scanner that has been used for offensive security purposes. We can just use the 'apt install nmap' command to install nmap. Just hit Enter or ‘Y’ to verify the installation.

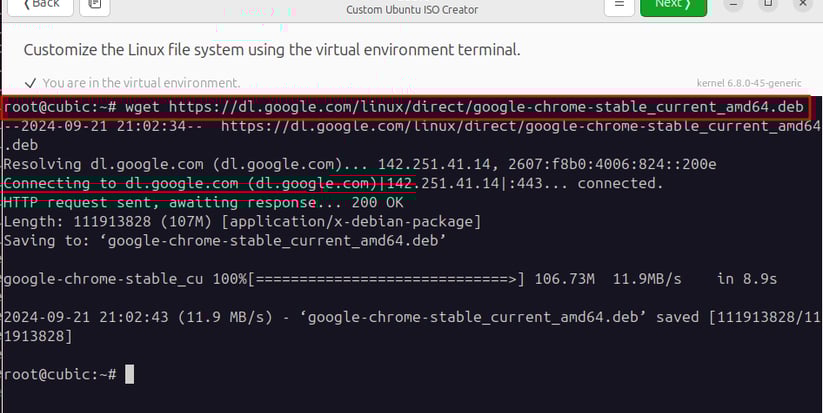
Okay great so we can install programs from Ubuntu's apt repository but what if we want to install a program not included from the repository such as Chrome. We will get an error "Unable to locate package chrome'. In this case we will need to install from an outside source with the ‘wget’ command for example. First we need to make sure we have wget installed. Either use the ‘dpkg -l wget’ or just type in ‘apt install wget’ to install the tool. It should be installed already. From there we will have to download chrome via an outside source using the command 'wget https://dl.google.com/linux/direct/google-chrome-stable_current_amd64.deb' as shown below.
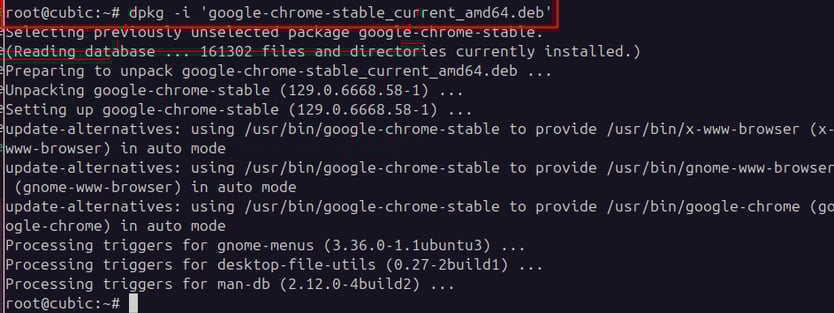
In order to install the package we need to use the ‘dpkg -i google-chrome-stable_current_amd64.deb’ command.
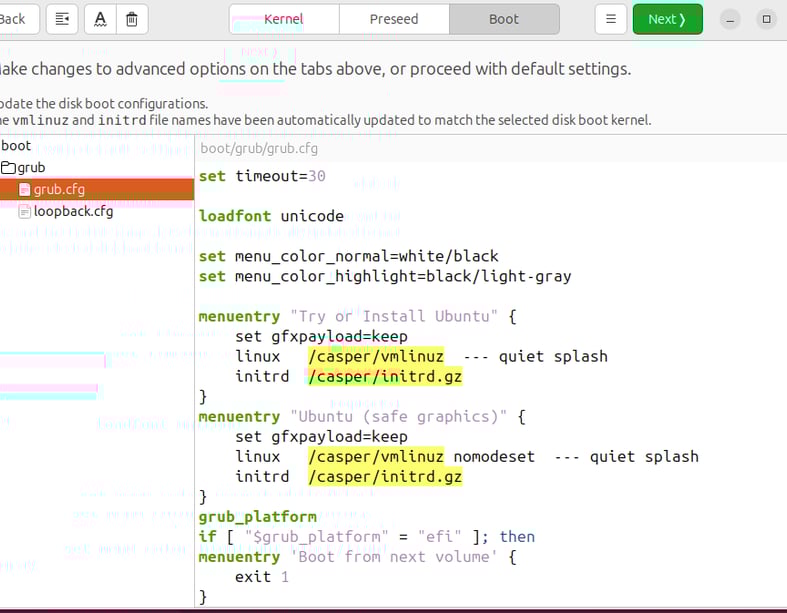
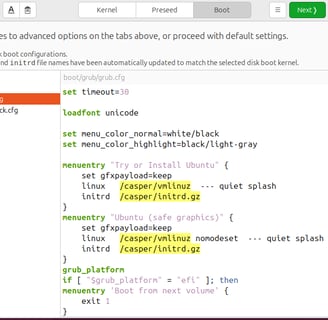
We can install various packages via Ubuntu's apt repository and from the outside here. Keep in mind the more programs you pre-install here the larger the image will be. This is definitely critical if you plan on using an older technology such as creating a DVD. Once you are done you can click on next in the upper right hand corner to proceed to the next step. The next screen you can choose the defaults and press Next or you can customize some more. You can edit what appears on startup such as editing the grub.cfg file if you want. When you are done you can just click ‘Next’
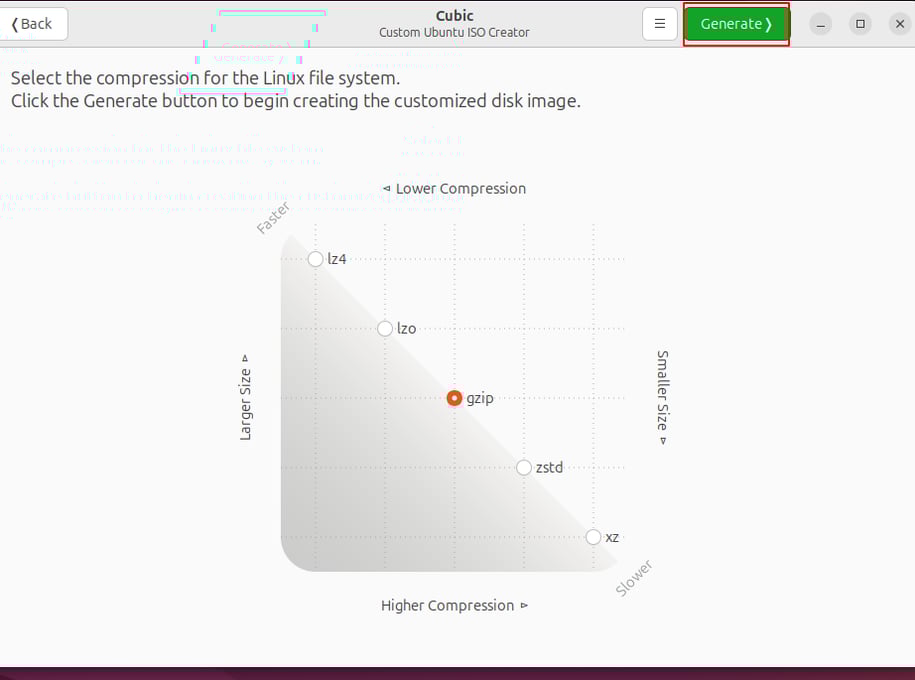
In the next screen you are given an option on how you would like to package the file. Keep in mind if you choose to make the file smaller than the default the more time it will take for the operation to complete. For the best result choosing the default option .gzip is sufficient so we can click on the ‘Generate’ button in the upper right hand corner.
t will take some time for it to finish as once it is done you can simply close the application by clicking on the red “Close” button and it should be stored in the folder you chose earlier. From here you can install the image on a USB or DVD or even use it with a virtual machine.
This project is one step in operating system development. It is a good way to get an idea on how an operating system works and provides an easy way to experiment with customization and learning the use of various components. While more of a general overview was displayed here, it is possible to not only install programs in the virtualized terminal we can also modify various configuration files in the environment for more advanced configuration such as possibly creating a personalized splash screen on bootup or creating a file on startup that will automatically run when the system boots for the first time after install. The possibilities are endless. In the future I plan on trying a few more advanced projects such as the Linux From Scratch (LFS) project which you build the Linux operating system from the kernel up as well as creating a minimal operating system from making a boot sector to adding components individually as a proof of concept. This would prove beneficial for understanding how operating systems work as well as how security concepts are incorporated into the design of an OS.